Most articles about designing a podcast studio start with a gear list. The mic. The mixer. The camera package. The interface. The monitors. The acoustic foam.
This is the wrong place to start.
Gear is the easiest part of designing a studio. It's also the part that owners obsess over most and that ultimately matters the least to whether the studio actually books out, retains clients, and produces work people are proud to send out. The decisions that do matter — the room shape, the way clients move through the space, the lighting, the brand that lives in every visible surface — are almost always made late, made cheaply, or made by default. And they're the ones that determine how the studio is perceived for the next ten years.
This is the design playbook for the decisions that actually move the needle.
Start With How the Space Is Used, Not What Goes In It
Before any layout decision, the most important question is operational, not aesthetic: how will clients move through the space?
A well-designed studio answers a series of physical questions before a client ever sits down at a mic. Where do they enter? Where do they wait if they arrive early? Where do they put their bag? Where is the bathroom? Where do they meet the producer? Where do they take a call between sessions? Where does the guest come in if they're separate from the host? Where does the photographer or extra crew set up for a content day?
A studio that gets this right feels effortless — clients arrive, get settled, and the recording starts on time. A studio that gets this wrong feels chaotic even when nothing technically goes wrong — guests bumping into each other in narrow hallways, hosts running cables across walking paths, producers sharing a desk with whoever's editing.
The most useful exercise an owner can do before any build-out begins is to physically walk through a typical session, from arrival to departure, in the empty space. Where do people stand? Where do they sit while waiting? Where does the producer brief the guest? Once those touchpoints are mapped, the room layout almost designs itself — and the gear decisions stop driving the floor plan.
Acoustics Are 80% of the Investment That Matters
In every podcast studio that punches above its weight, the gear is competent and the room is exceptional. That's almost always the order — not the other way around.
Acoustic treatment is the most under-budgeted, under-valued line item in most studio builds. Owners spend $15,000 on a camera rig and $1,200 on acoustic panels. The result is a beautiful-looking space with the audio of a kitchen, and the audio is the thing the client actually leaves with.
The right acoustic budget for a typical studio room is closer to the gear budget than most owners want to hear. Proper bass trapping in the corners, broadband absorption on the first reflection points, diffusion on the rear wall, and a dead-but-not-too-dead vocal zone is the standard. Done well, this is a $5,000–$15,000 investment per room depending on room size. Done badly or skipped, the studio will sound like every cheap setup on the internet — and no amount of expensive gear will fix it in post.
The other acoustic decision that gets skipped: isolation between rooms. If you have a producer station, a control room, or a second recording space, the walls between them need to actually block sound. Standard drywall doesn't. Studios that skip this end up unable to use two rooms simultaneously, which means half the space sits idle on busy days. Done properly during build-out, isolation costs a fraction of what it costs to retrofit later.
Lighting Is the Visual Voice of the Studio
The single biggest visual differentiator between a studio that looks like a podcast studio and a studio that looks like a polished, professional space is lighting.
Most studios under-invest here. They put in a few key lights, a couple of fills, and call it done. The result is functional but flat — every shot looks roughly the same as every other studio in the city.
Studios that take lighting seriously make three specific decisions. First, they build for the look, not just for the camera — practical lights in the background, accent lighting on textured surfaces, RGB tube lights or wall washes that give every shot a depth and a colour signature. Second, they make the lighting flexible. Different shows want different moods. A motorised dimmer system or a small DMX controller lets the studio pivot between a warm interview look and a high-contrast solo show without rebuilding the set. Third, they consider lighting as part of the brand. The colour palette of the studio's lighting should match the colour palette of the studio's marketing. Clients show up, look at the room, and immediately understand why this studio is different.
This is also one of the highest-ROI build-out items. A $4,000–$8,000 lighting package transforms a $50,000 build-out from "fine" into "Instagram-worthy" — and that visual identity becomes the single most powerful marketing asset the studio has.
The Brand Has to Live in the Room
A studio that doesn't visibly look like a brand is a studio that's invisible in social-media-led marketing. Every photo a client posts from your studio is either an ad for the studio or a missed opportunity.
The studios that translate well to social make deliberate brand decisions in the build-out: a feature wall that incorporates the studio name or a strong colour, a neon sign or signature wall art that becomes a recognisable backdrop, distinct colour-blocking across walls and furniture, branded merch in the space (cups, hoodies, lanyards) that quietly appear in client shots.
This isn't about plastering the logo everywhere. It's about creating a visual signature that's recognisably this studio. Look at any of the studios with strong social presence — the brand decisions in the room are doing more marketing work than the marketing team is.
A specific, easy win most studios miss: the corner that gets photographed most often (usually behind the host position) should be the most visually distinctive area in the room. Identify it before opening and design it intentionally.
Furniture, Surfaces, and the Texture That Camera Loves
The often-missed third tier of design decisions: the surfaces and textures the camera actually picks up.
Plain painted walls read flat on camera. Acoustic foam that's visible on camera reads cheap. White rooms blow out under strong key lights. Glossy desks reflect lighting back into shot. Each of these is a small thing on its own — together they're the difference between footage that looks expensive and footage that looks like a side-project.
The studios that get this right consistently use natural texture: brick walls, raw concrete, exposed wood, plants, fabric panels that double as acoustic treatment, books on shelving behind hosts. The materials do double duty — they treat the room acoustically and they give the camera something interesting to find.
Furniture choices matter for the same reason. A heavy, low desk reads premium on camera. A folding plastic table doesn't. Comfortable, distinct chairs read as "this studio cares about hosts." Stackable office chairs read as "this is a meeting room with a microphone."
None of this is expensive in the build-out budget. It's a sourcing exercise — finding the warehouse, the vintage store, the local maker, the secondhand find that makes the room feel like somewhere serious work happens.
The Decisions That Save You Money Later
A few practical, often-skipped decisions that pay back many times over:
Run more cable than you think you need, during the build. Conduit through walls. Extra HDMI and Ethernet runs. Spare power circuits. Adding these later is brutal. Adding them during the original electrical pass is cheap.
Future-proof for a second camera position. Even if you start with one camera angle, pre-wire and pre-plan for two more. Studios that hit growth often end up cutting walls open three years later to add what should have been built in.
Soundlock vestibules at doors. Two doors between the recording space and the noisy street/hallway. Massive isolation win for relatively little cost during build.
Climate control matters more than people realise. A studio with a noisy HVAC system is a studio with bad audio. Spec quiet units. Run them on the right circuits. Add insulation to ducting.
Always overspec the electrical. Studio gear pulls more current than most contractors plan for. Trip a breaker mid-session once and you'll wish you'd asked for a dedicated panel.

The One-Line Summary
A great podcast studio isn't a beautiful gear list. It's a room that works for the people moving through it, sounds excellent on day one, looks distinctively yours on every photo and clip that leaves it, and was built by someone who knew the next ten years matter more than the first month.
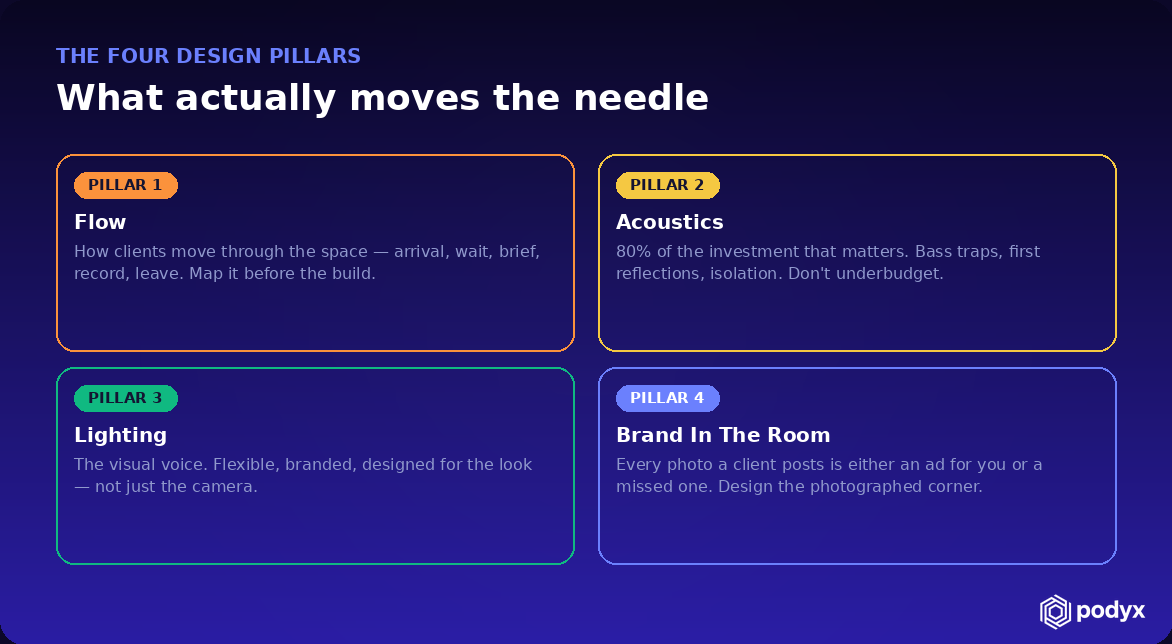
If you get the four pillars right — flow, acoustics, lighting, brand — the studio will earn the right to keep adding gear. If you skip them, no amount of equipment will compensate.
That's the design that actually matters.
Want to see how Podyx supports the operational side of a well-designed studio — room scheduling, multi-room workflows, client-flow management, and brand-consistent booking experiences? Book a free 30-minute walkthrough.
Podyx gives your studio a polished, on-brand booking experience that matches the quality of the space you built. Try it free for 30 days, no credit card required.
.jpg)